Pilates can be a valuable tool for weight loss when combined with a balanced diet and regular cardiovascular exercise. While Pilates alone may not burn as many calories as high-intensity cardio workouts, it offers numerous benefits that can support weight loss efforts. Here’s how Pilates can contribute to weight loss and some exercises that can help:
Core Strength: Pilates exercises target the deep core muscles, including the abdominals, back muscles, and pelvic floor. By strengthening these muscles, Pilates helps improve posture, stability, and overall body alignment. This can lead to increased calorie burn and improved efficiency in other forms of exercise.
Exercise: The Hundred, Roll-Up, Plank variations, and Pilates teaser.
Muscle Tone and Definition: Pilates involves performing controlled, precise movements that engage multiple muscle groups simultaneously. By building lean muscle mass, you can increase your resting metabolic rate, meaning you burn more calories even at rest. Additionally, toned muscles give your body a more sculpted appearance.
Exercise: Pilates Bridge, Side Leg Lifts, Single Leg Circles, and Scissor exercises.
Flexibility and Range of Motion: Pilates incorporates stretching exercises that improve flexibility, mobility, and joint range of motion. This can enhance your overall exercise performance, allowing you to engage in more vigorous activities that promote weight loss.
Exercise: Spine Stretch Forward, Swan Dive, Saw, and Mermaid stretch.
Body Awareness and Mindful Eating: Pilates emphasizes body awareness, proper breathing, and mindful movement. By connecting your mind and body during Pilates practice, you can become more attuned to your hunger and satiety cues. This awareness can help you make healthier choices and practice mindful eating, which supports weight loss.
Stress Reduction: Pilates promotes relaxation and reduces stress through controlled breathing and focused movement. Stress can often contribute to weight gain or difficulty losing weight, so incorporating stress-reducing exercises like Pilates can be beneficial for weight loss efforts.
Here are a few statistics and insights related to Pilates and weight loss:
- Calorie Burn: The number of calories burned during a Pilates session can vary based on factors such as the intensity of the exercises, individual body weight, and duration of the workout. On average, a one-hour Pilates session can burn approximately 200-400 calories. However, this may vary for each individual.
- Muscle Toning: Pilates focuses on strengthening and toning the muscles, particularly the abdominal muscles. As you build lean muscle mass, it can increase your metabolism and help with weight management in the long term. Remember that muscle weighs more than fat, so even if the scale doesn’t change significantly, you may notice changes in body composition and appearance.
- Improved Body Awareness: Pilates helps develop body awareness, which can lead to better alignment, posture, and movement patterns. This can result in a more efficient and effective workout, allowing you to engage the right muscles and burn calories more effectively during other forms of exercise.
- Stress Reduction: Pilates incorporates controlled breathing and mindful movements, which can help reduce stress and promote overall well-being. Stress management plays a role in weight management as high stress levels can contribute to overeating or making unhealthy food choices.
- Supportive Environment: Participating in Pilates classes or working with a qualified instructor can provide a supportive community and guidance, which can help with motivation and consistency in your weight loss journey.
While Pilates is often associated with improving flexibility, strength, and posture, there is limited research specifically focusing on Pilates as a primary method for weight loss. However, some studies have explored the potential benefits of Pilates as part of a comprehensive weight loss program. Here are a few studies that provide insights into the relationship between Pilates and weight loss:
- A study published in the Journal of Bodywork and Movement Therapies in 2015 examined the effects of Pilates on body composition in overweight and obese women. The participants engaged in Pilates exercises three times per week for eight weeks. The study found that Pilates significantly reduced body fat percentage and waist-to-hip ratio in the participants.
- A study published in the Journal of Sports Medicine and Physical Fitness in 2018 investigated the effects of a combined intervention of Pilates and aerobic exercise on body composition and cardiovascular fitness in sedentary overweight women. The participants underwent 12 weeks of combined Pilates and aerobic exercise sessions. The study showed significant improvements in body composition, including reductions in body weight, body fat percentage, and waist circumference.
- Another study published in the Journal of Strength and Conditioning Research in 2010 compared the metabolic demands of Pilates exercises to traditional resistance exercises. The findings revealed that Pilates exercises can elicit a moderate cardiovascular response, suggesting that they can contribute to overall calorie expenditure and potentially aid in weight management.
It’s important to note that these studies highlight the potential benefits of Pilates as part of a comprehensive weight loss program that includes other elements such as aerobic exercise, dietary changes, and lifestyle modifications. Pilates alone may not be as effective for significant weight loss compared to activities that have a higher calorie-burning component.
While these studies provide some insights into the effects of Pilates on weight-related factors, more research is needed to establish a direct causal relationship between Pilates and weight loss.
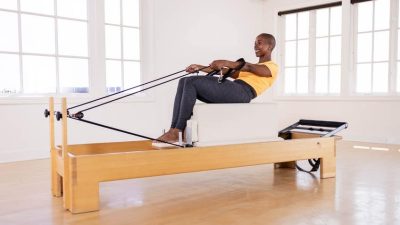
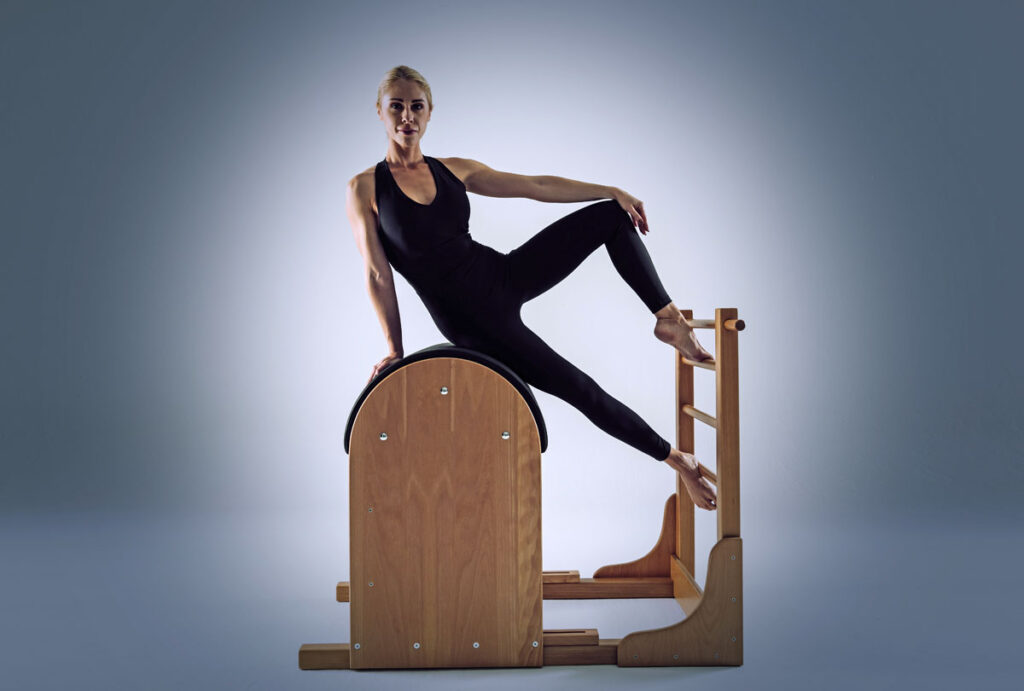
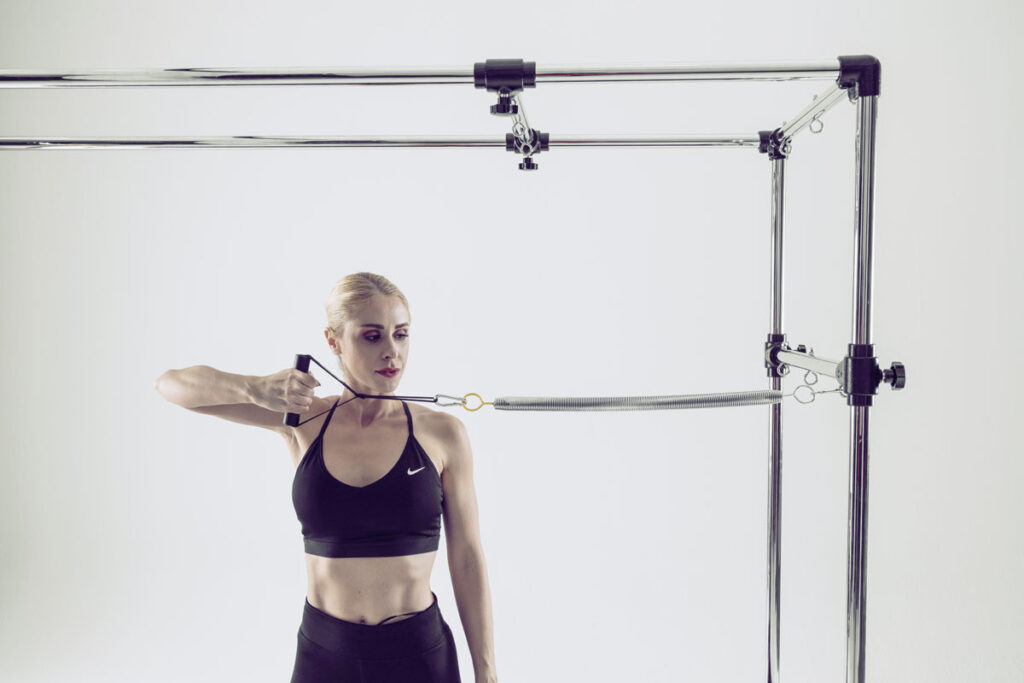
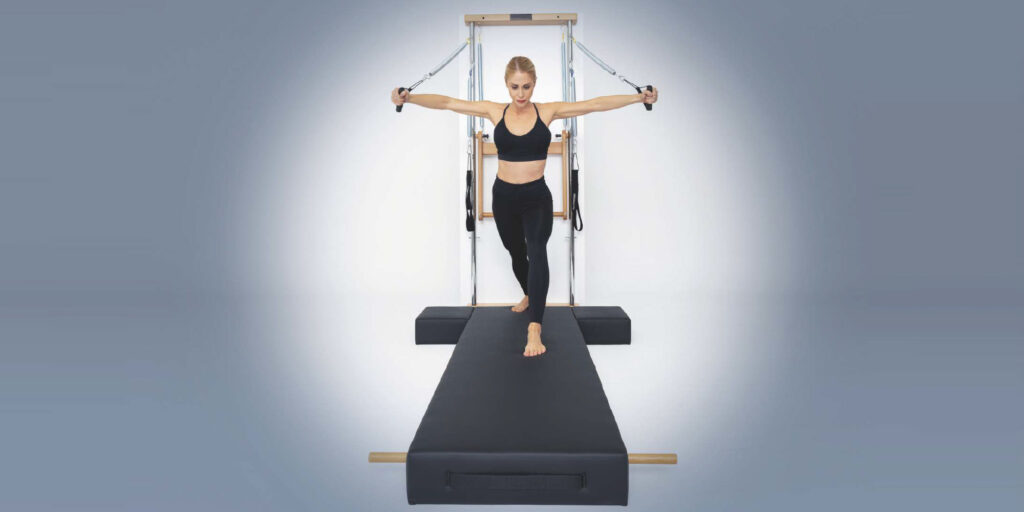
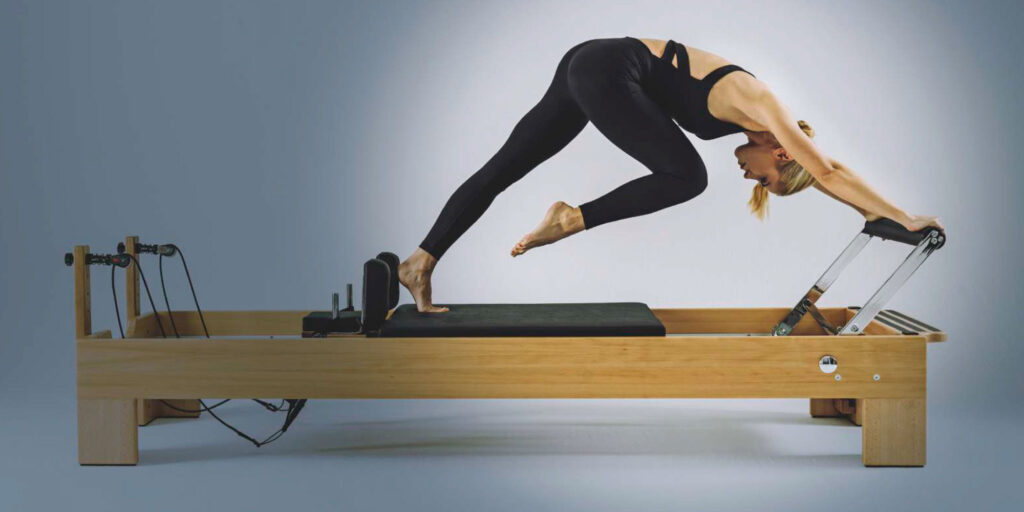
Pilates Equipment Fitness has all the accessories to perform the mentioned exercises. Additionally, the equipment which will allow you to reach to much better results such as the Pilates Reformer Vintage, the Pilates Reformer with Tower Vintage, the Pilates Cadillac Reformer Vintage, the Pilates Chair Vintage, the Pilates Ladder Barrel Vintage, the Pilates Spine Corrector, the Pilates Wall Unit, the Pilates Spring Wall, and the Pilates Pedi Pole.
How to perform the mentioned exercises:
The Hundred is a classic Pilates exercise that targets the abdominal muscles and helps to warm up the body. Here’s how to perform the Pilates Hundred:
- Lie on your back on a mat or a comfortable surface. Make sure your spine is in a neutral position, and your legs are extended straight out in front of you, together.
- Connect your ribs sending them toward your spine. . Keep your shoulders relaxed and your neck long.
- Lift your head, neck, and shoulders off the mat, curling your upper body into a small crunch position. This is your starting position.
- Extend your arms long by your sides, hovering them slightly above the mat. Palms should face down.
- Inhale deeply through your nose, preparing for the exercise.
- As you exhale, simultaneously lift both your legs off the mat to a tabletop position (knees bent at a 90-degree angle), and pump your arms up and down rapidly in a controlled manner. You can advance the exercise by extending the legs to 45-degree angle.
- Continue the pumping motion of the arms as you inhale for five counts and exhale for five counts, completing ten full breath cycles (hence the name “Hundred”).
- As you pump your arms, focus on keeping your connect your ribs and your lower back pressed into the mat. Be mindful of your breath, drawing it deep into your abdominals.
- If you feel any strain or tension in your neck, you can modify the exercise by keeping your head down on the mat and focusing on the arm movements and rib engagement.
- After completing the ten breath cycles, slowly lower your legs back down to the starting position, and gently lower your head, neck, and shoulders back onto the mat.
Tips for Proper Form:
The Pilates Hundred can be challenging, especially for beginners. It’s important to maintain control and precision throughout the exercise, rather than rushing through it. Start with a lower number of breath cycles, such as five, and gradually work your way up to ten as you build strength and endurance.
The Pilates Roll-Up is a challenging exercise that targets the core muscles, particularly the abdominals. Here’s a step-by-step guide on how to perform the Pilates Roll-Up:
- Start by lying flat on your back on a mat with your legs extended straight out in front of you. Extend your arms overhead, reaching them towards the ceiling.
- Take a deep breath in, and as you exhale, connect your ribs sending them toward your spine. . Imagine pressing your lower back into the mat.
- Begin the movement by slowly rolling up one vertebra at a time, peeling your spine off the mat. Start by lifting your head, then continue to curl your upper body forward, reaching your arms towards your toes.
- As you roll up, maintain a rounded spine, articulating each vertebra and maintaining control throughout the movement. Avoid using momentum or relying solely on your neck or shoulders to lift you up.
- Once you’ve reached your maximum forward flexion, inhale at the top position, and prepare for the next part of the exercise.
- Exhale and initiate the return by slowly uncurling your spine, starting from the upper back, rolling down one vertebra at a time until your back is flat on the mat again. Keep your connect your ribs and maintain control throughout the descent.
- Repeat the roll-up for the desired number of repetitions, aiming for smooth and controlled movements.
Tips for Proper Form:
- Focus on using your abdominal muscles to initiate and control the movement rather than relying on momentum.
- Keep your shoulders relaxed and away from your ears throughout the exercise.
- Maintain a deep connection with your ribs, keeping your navel drawn toward your spine.
- If you find it challenging to roll up fully, you can modify the exercise by bending your knees slightly or reaching your arms towards your knees instead of your toes.
The Pilates Roll-Up requires both strength and flexibility, so it’s important to listen to your body and progress at your own pace. If you’re new to this exercise, you may want to start with a modified version and gradually work your way towards the full roll-up as your core strength improves.
Plank variations are excellent exercises in Pilates that engage the core, arms, shoulders, and leg muscles while promoting stability and strength. Here are a few plank variations you can incorporate into your Pilates routine:
- High Plank:
- Begin in a push-up position with your hands directly under your shoulders and your legs extended behind you.
- Engage your ribs, keeping your body in a straight line from head to heels.
- Avoid sagging or lifting your hips too high.
- Hold this position for a desired amount of time, starting with 15-30 seconds and gradually increasing as you build strength.
- Forearm Plank:
- Start by kneeling on the mat and lower yourself onto your forearms, elbows directly under your shoulders.
- Extend your legs behind you, keeping them together.
- Engage your ribs, glutes, and leg muscles to maintain a straight line from head to heels.
- Hold this position for the desired amount of time, aiming for 15-30 seconds initially and progressing as you get stronger.
- Side Plank:
- Begin by lying on your side, propped up on one forearm with your elbow directly under your shoulder.
- Stack your feet on top of each other or stagger one in front of the other, the top one in front, for more stability.
- Lift your hips off the mat, creating a straight line from head to heels.
- Engage your ribs and avoid collapsing or sinking into the shoulder.
- Hold the side plank for the desired amount of time, then switch sides.
- Plank with Leg Lift:
- Start in a high plank position with your hands directly under your shoulders.
- Engage your ribs and lift one leg off the mat, extending it straight behind you.
- Keep your body stable and avoid twisting or dropping the hips.
- Hold for a few seconds, then lower the leg and repeat with the other leg.
- You can alternate legs or perform a set on one side before switching.
- Plank with Knee Tucks:
- Begin in a high plank position with your hands under your shoulders.
- Engage your ribs and bring one knee towards your chest, rounding your back slightly.
- Extend the leg back out and repeat with the other knee.
- Maintain stability in the upper body and avoid excessive movement in the hips.
Tips for Proper Form:
Remember to maintain proper form and alignment throughout these plank variations. Start with modifications or shorter durations and gradually increase the intensity as you become more comfortable and stronger.
The Pilates Teaser is an advanced exercise that challenges your core strength, balance, and flexibility. It involves a flowing movement that transitions from lying on your back to a V-sit position. Here’s a step-by-step guide on how to perform the Pilates Teaser:
- Begin by lying flat on your back on a mat with your legs extended straight out in front of you. Extend your arms overhead, reaching them towards the ceiling.
- Take a deep breath in, and as you exhale, connect your ribs sending them toward your spine. . Imagine pressing your lower back into the mat.
- Inhale and initiate the movement by simultaneously lifting your head, neck, and shoulders off the mat, curling your upper body into a small crunch position. At the same time, lift your legs off the mat, maintaining a straight line with your body.
- Exhale and continue to roll your spine off the mat, articulating one vertebra at a time, as you reach your arms forward and extend your legs up towards the ceiling. Try to balance on your sit bones in a V-sit position, forming a “V” shape with your body.
- Inhale at the top position, maintaining your balance and connecting your ribs.
- Exhale and slowly reverse the movement, rolling your spine back down to the mat, one vertebra at a time. Lower your legs and return your arms overhead to the starting position.
- Repeat the movement for the desired number of repetitions, aiming for smooth and controlled transitions.
Tips for Proper Form:
- Keep your ribs connected throughout the entire exercise, maintaining control and stability.
- Imagine lengthening your spine as you roll up and down, avoiding any hunching or collapsing of the shoulders.
- Focus on the deep connection to initiate and control the movement.
- Maintain a long neck and avoid straining or tensing the muscles in your neck and shoulders.
- If you find it challenging to lift both legs simultaneously, you can modify the exercise by bending your knees or performing a single leg teaser.
The Pilates Teaser requires practice and patience to master, so it’s essential to progress gradually and listen to your body.
The Pilates Bridge is a classic exercise that targets the glutes, hamstrings, and core muscles while promoting spinal mobility and stability. Here’s a step-by-step guide on how to perform the Pilates Bridge:
- Start by lying flat on your back on a mat with your knees bent and feet hip-width apart. Keep your arms relaxed by your sides, palms facing down.
- Take a deep breath in, and as you exhale, connect your ribs sending them toward your spine. . Imagine pressing your lower back into the mat.
- Inhale to prepare, and as you exhale, begin to peel your spine off the mat, starting from your tailbone and rolling up one vertebra at a time.
- Continue rolling up until your body forms a diagonal line from your shoulders to your knees. Your shoulders, upper back, and feet should remain grounded on the mat.
- At the top position, check your alignment: your knees should be directly over your ankles, and your thighs should be parallel to each other. Avoid letting your knees fall inward or splay outward.
- Avoid overarching your lower back or sinking into your shoulders.
- Inhale and prepare for the descent. As you exhale, slowly roll your spine back down to the mat, one vertebra at a time, maintaining control and stability throughout the movement.
- Once your lower back and pelvis are back on the mat, relax your body and take a breath before repeating the exercise for the desired number of repetitions.
Tips for Proper Form:
- Focus on initiating the movement from your pelvic floor and lower abdominals to engage your ribs and lift your hips.
- Avoid pushing your hips too high, as it can strain your lower back. Aim for a straight line from your shoulders to your knees.
- Maintain stability by pressing down evenly through your feet, engaging your glutes and hamstrings.
- Keep your neck and shoulders relaxed throughout the exercise, avoiding tension or strain in these areas.
- If you want to increase the challenge, you can perform the bridge with one leg lifted or place a Pilates ball or block or a fitness ring between your knees for added resistance.
As always, it’s essential to listen to your body, modify the exercise as needed, and progress at your own pace.
Bottom of Form
The Side Leg Lift is a Pilates exercise that targets the muscles of the outer thighs, hips, and glutes. It helps to strengthen and tone these areas while promoting stability and balance. Here’s a step-by-step guide on how to perform the side leg lift:
- Start by lying on your side on a mat. Align your body so that your hips and shoulders are stacked on top of each other, and your legs are extended straight out. You can rest your head on your bottom arm for support.
- Connect your ribs sending them toward your spine. . This will help stabilize your torso throughout the exercise.
- Inhale to prepare, and as you exhale, lift your top leg off the mat, keeping it straight. Lift it to a comfortable height, avoiding any strain or tension in your hip or lower back.
- Pause briefly at the top of the movement, ensuring that your body remains aligned and balanced.
- Inhale as you lower your leg back down to the starting position in a controlled manner, without allowing it to touch the bottom leg.
- Repeat the leg lift for the desired number of repetitions, maintaining proper form and control.
- After completing the set on one side, switch to the other side and perform the exercise with the opposite leg.
Tips for Proper Form:
- Keep your body aligned throughout the exercise, with your shoulders, hips, and legs in one straight line.
- Avoid rolling your hips forward or backward, and ensure that your top hip doesn’t rotate forward.
- Focus on engaging the muscles of the outer thigh and glutes to lift the leg, rather than relying on momentum.
- Maintain stability in your core to support your body during the movement.
- Perform the exercise in a slow and controlled manner, emphasizing quality of movement over speed.
- If you find it challenging to lift your leg straight up, you can modify the exercise by slightly bending your bottom leg or lowering the range of motion.
As with any exercise, it’s important to listen to your body, start with appropriate modifications, and gradually increase the intensity as you become stronger.
The Single Leg Circles targets the core, hip muscles, and improves hip mobility. It involves drawing circles with one leg while maintaining stability and control in the torso. Here’s a step-by-step guide on how to perform the Single Leg Circles:
- Start by lying flat on your back on a mat with your legs extended straight out in front of you. Relax your arms by your sides, palms facing down.
- Connect your ribs sending them toward your spine. . This will help stabilize your torso throughout the exercise.
- Lift one leg off the mat, keeping it extended straight up toward the ceiling. This will be your working leg for the Single Leg Circles.
- Inhale to prepare, and as you exhale, begin to draw a circle with your working leg. Start by crossing the midline of your body and move the leg outward, creating a circle shape.
- Continue the circle movement, reaching as far out as is comfortable for your flexibility without straining or lifting your hip off the mat.
- As you complete the circle, bring your leg back to the starting position, crossing the midline of your body again.
- Reverse the direction of the circle, this time moving your leg outward and then back to the starting position, crossing the midline once more.
- Repeat the leg circles for the desired number of repetitions in one direction, and then reverse the direction for an equal number of repetitions.
- After completing the set on one leg, switch to the other leg and perform the exercise with the opposite leg.
Tips for Proper Form:
- Keep your torso stable and grounded on the mat throughout the movement, avoiding any rocking or shifting.
- Focus on using your hip muscles to control the movement of the leg, rather than relying on momentum.
- Maintain a steady and controlled pace, emphasizing precision and fluidity in the circle motion.
- Engage your ribs to support your lower back and maintain proper alignment.
- If you find it challenging to keep your leg straight, you can modify the exercise by slightly bending the knee of your working leg.
Remember to breathe consistently throughout the exercise, inhaling and exhaling with each circle. As with any Pilates exercise, it’s important to listen to your body, start with appropriate modifications, and gradually increase the intensity and range of motion as you become more comfortable and stronger.
The Scissor Exercise, also known as Scissors or Single Leg Stretch, is a classic Pilates exercise that targets the core muscles, particularly the abdominals, while also engaging the hip flexors and legs. It involves a dynamic movement of alternating leg extensions while maintaining a stable upper body. Here’s a step-by-step guide on how to perform the Scissor Exercise:
- Start by lying flat on your back on a mat with your legs extended straight out in front of you. Place your hands by your sides, palms facing down, for support.
- Connect your ribs sending them toward your spine.
- Lift both legs off the mat, keeping them extended straight up toward the ceiling. This will be your starting position.
- Inhale to prepare, and as you exhale, lower one leg toward the mat, while the other leg remains lifted and stationary.
- Simultaneously, reach your opposite hand toward the ankle or shin of the leg that is lowering. You can support your head by placing your other hand behind it, or you can keep both arms long by your sides for a more challenging variation.
- Inhale and switch the position of your legs, bringing the leg that was lowered back up to the starting position while lowering the opposite leg. As you switch, reach your opposite hand toward the ankle or shin of the new working leg.
- Continue alternating legs and arms in a rhythmic scissor-like motion, coordinating the movements with your breath.
- Aim for a smooth and controlled pace, maintaining stability and control in your torso and avoiding any rocking or excessive movement.
- Repeat the scissor exercise for the desired number of repetitions or duration.
Tips for Proper Form:
- Connect your ribs throughout the exercise, drawing your navel toward your spine to support your lower back.
- Maintain a relaxed and lengthened neck, avoiding tension or strain in the upper body.
- Focus on the deep connection to initiate and control the movement.
- Keep your legs straight and energized, with a slight engagement of your inner thighs.
- Coordinate your breath with the movement, inhaling to prepare and exhaling as you switch legs.
- If you find it challenging to keep your legs straight, you can modify the exercise by slightly bending the knees.
As with any Pilates exercise, it’s important to listen to your body, start with appropriate modifications, and gradually increase the intensity as you become more comfortable and stronger.
The Spine Stretch Forward focuses on spinal articulation, flexibility, and stretching the back muscles. It helps to lengthen the spine, improve posture, and promote rib engagement. Here’s a step-by-step guide on how to perform the Spine Stretch Forward:
- Sit tall on a mat with your legs extended straight out in front of you, hip-width apart. Flex your feet, pointing your toes toward the ceiling.
- Sit up tall, lengthening your spine and engaging your ribs. Imagine a string pulling you upward from the crown of your head.
- Inhale to prepare, and as you exhale, start by tilting your pelvis forward slightly, allowing your lower back to lengthen and curve naturally.
- Continue to exhale as you initiate the forward movement by tucking your chin toward your chest and slowly rolling your spine forward, one vertebra at a time. Imagine creating a C-curve with your spine as you round forward.
- Reach your arms forward alongside your legs, keeping them parallel to the mat. Allow your head to relax, and maintain length in your neck.
- Inhale and hold the forward stretch position for a moment, feeling a gentle stretch in your back and hamstrings.
- Exhale as you initiate the return movement. Start by engaging your core and slowly roll your spine back up to an upright sitting position, one vertebra at a time.
- Stack your spine sequentially, bringing your head up last and lifting tall through your crown.
- Repeat the movement for the desired number of repetitions, focusing on maintaining control, fluidity, and breath coordination.
Tips for Proper Form:
- Connect your ribs throughout the exercise to support your spine and maintain stability.
- Focus on lengthening and articulating your spine as you roll forward, segment by segment.
- Avoid any jerking or bouncing movements. Emphasize a smooth, controlled motion.
- Keep your shoulders relaxed and away from your ears throughout the exercise.
- Maintain engagement of your ribs to avoid excessive pressure on your lower back.
- Modify the range of motion according to your flexibility and comfort level. You can adjust the degree of rounding forward based on your flexibility.
Remember to listen to your body, modify the exercise as needed, and perform it within your comfortable range of motion. Bottom of Form
The Swan Dive is an intermediate to advanced Pilates exercise that targets the back muscles, particularly the erector spinae, while promoting spinal mobility and strengthening the posterior chain. It involves a controlled extension of the spine while engaging the core and upper body muscles. Here’s a step-by-step guide on how to perform the Swan Dive:
- Start by lying flat on your stomach on a mat with your legs extended straight behind you. Position your arms by your sides, palms facing down.
- Connect your ribs sending them toward your spine. and lengthen your spine, imagining energy flowing out through the crown of your head.
- Inhale to prepare, and as you exhale, initiate the movement by lifting your head, neck, and shoulders off the mat. Simultaneously, lift your arms off the mat, reaching them forward and extending them overhead.
- Continue to exhale as you begin to extend your spine, peeling your upper body off the mat one vertebra at a time. Imagine lengthening your torso and reaching forward with your fingertips as you lift higher.
- As you extend your spine, keep your legs firmly grounded on the mat and maintain stability in your core. Avoid sinking into your lower back or hyperextending your neck.
- Inhale and hold the extended position for a moment, feeling a stretch in your abdominals and front of the body, while maintaining engagement in your back muscles.
- Exhale as you initiate the return movement. Begin by lowering your upper body back down to the mat, one vertebra at a time, until your head, neck, and shoulders are resting comfortably.
- Lower your arms back to the starting position by your sides, palms facing down.
- Repeat the movement for the desired number of repetitions, focusing on controlled and fluid movements.
Tips for Proper Form:
- Engage your ribs throughout the exercise to support your spine and maintain stability.
- Imagine lengthening your spine as you lift, avoiding any tension or compression in your lower back.
- Maintain a neutral neck position, avoiding excessive strain or tension. Keep your gaze slightly forward or down to avoid hyperextension.
- Focus on the connection with your back muscles to control the movement and avoid relying on momentum.
- Keep your shoulder blades down and away from your ears, maintaining space and openness in the chest.
- Modify the range of motion and intensity according to your flexibility and strength level.
As the Swan Dive is an intermediate to advanced exercise, it’s important to progress gradually, listen to your body, and seek guidance from a qualified Pilates instructor. They can provide personalized modifications and ensure proper form and technique.
The Mermaid Stretch is a wonderful Pilates exercise that focuses on lateral flexion of the spine, stretching the side of the body, and promoting flexibility and mobility. It targets the obliques, waist muscles, and ribcage while improving posture. Here’s a step-by-step guide on how to perform the Mermaid Stretch:
- Begin by sitting tall on a mat with your knees bent to one side, your weight resting on your hip, and your feet flexed. One leg will be folded in front of you, and the other leg will be tucked behind you, with your knee pointing out to the side.
- Connect your ribs sending them toward your spine. , and lengthen your spine, imagining a string pulling you upward from the crown of your head.
- Inhale to prepare, and as you exhale, elongate your spine to one side. Imagine reaching your ribcage away from your hips.
- Place one hand on the mat beside your hip for support and lift the opposite arm up and over your head, extending it toward the side you’re leaning.
- Continue to reach and lengthen your arm, feeling a gentle stretch along the side of your body, from your hip to your fingertips. Avoid any strain or tension.
- Inhale and hold the stretched position for a moment, maintaining stability and length in your spine.
- Exhale as you return to an upright position, bringing your arm back down to your side and aligning your spine.
- Repeat the stretch to the other side by shifting your legs, folding the opposite leg in front and tucking the other leg behind you.
- Perform the Mermaid Stretch on both sides, alternating the lateral flexion and stretch.
Tips for Proper Form:
- Keep your ribs connected throughout the exercise to support your spine and maintain stability.
- Maintain an elongated spine, avoiding any collapsing or rounding in the upper body.
- Focus on the lateral flexion of your spine, reaching through the side of your body rather than collapsing forward or backward.
- Avoid lifting your hip off the mat; instead, sit firmly on your hip while stretching to the side.
- Visualize lengthening through the fingertips as you reach your arm overhead.
- Modify the range of motion and intensity according to your flexibility and comfort level.
Remember to breathe deeply and evenly throughout the exercise, allowing your breath to support and enhance the stretch.
Top of Form
It is of paramount importance to listen to your body, and modify the exercise as needed. If you have any existing injuries or conditions, it’s always a good idea to consult with a qualified Pilates instructor to ensure you perform the exercises correctly and safely, and can design a program tailored to your individual needs and goals. They can guide you through proper form and progression to ensure you get the most out of your Pilates practice.
Weight loss is a complex process influenced by various factors such as genetics, diet, overall physical activity, and individual metabolism. While Pilates can contribute to weight loss indirectly, combining it with a balanced diet and other forms of cardiovascular exercise can yield better results. Consulting with a healthcare professional or a qualified Pilates instructor is recommended to create a personalized plan that aligns with your specific goals and needs.
Alicia Biosca
Polestar Miami – Pilates Instructor