Is there a feat of strength more visually striking than taking a heavy chunk of metal from the ground, heaving it into the air, and locking it overhead? The image alone, sometimes seen in silhouette, is iconic.
The clean & jerk, along with the snatch, make up the Olympic lifts — the only strength sport currently competed in the Olympics. The “C&J” is a complete movement which can develop strength, power, coordination, speed, and muscle throughout your whole body if you can master it.
No wonder it is used in many strength and conditioning programs to produce high-performance athletes, or that the exercise made its way into CrossFit training, which emphasizes challenging your entire body as often as possible.
The clean & jerk is composed of two distinct movements: the clean and the jerk (yes, it’s that simple). Each of these lifts is complex enough on its own, and combining both during a single repetition is a challenging task. But don’t worry, you’re about to discover a detailed breakdown on how to master this beast of a lift.
Clean & Jerk
How to Do the Clean & Jerk Step by Step
The clean & jerk is an explosive movement that requires (and builds) strength, coordination, and speed. You cannot perform a correct clean & jerk slowly. This is one of the reasons why it’s so demanding. The technique requires timing, mobility, and total-body coordination.
Ideally, you’ll load the bar with specialized, rubber-coated bumper plates which allow a safer and more efficient way to perform the final phase of each repetition, but the clean & jerk can be performed (carefully) with any metal plates.
Step 1 — Get Into the Starting Position
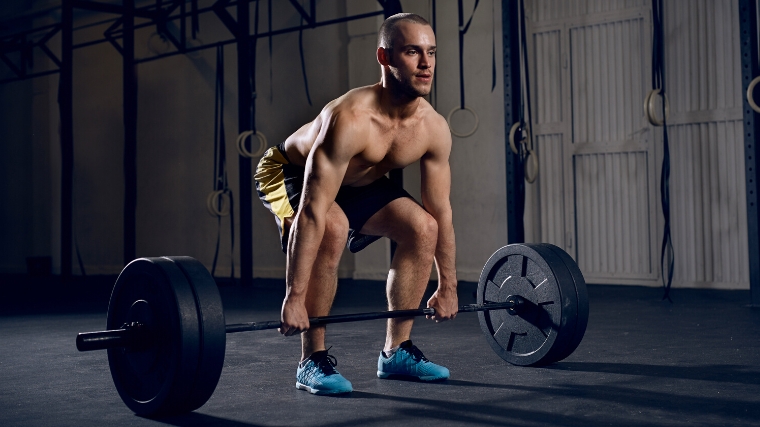
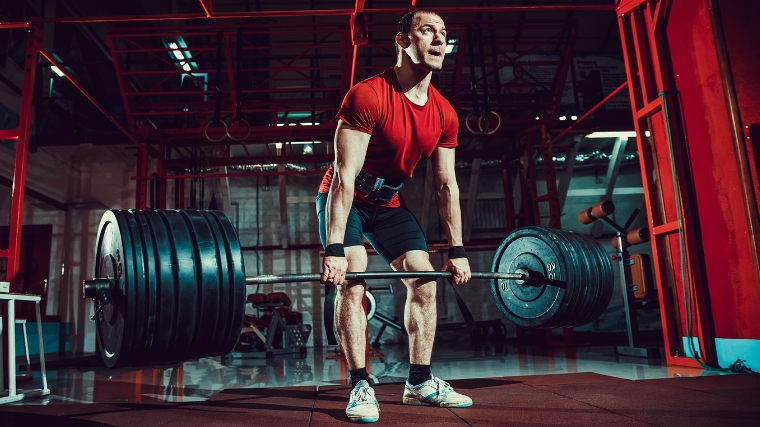
Stand in front of a barbell on the ground with a hips-wide stance. Angle your toes and knees slightly outward. Bend at your hips and hinge forward to grab the bar with a slightly wider than shoulder-width grip, using a pronated (palm down) grip.
Squat down until your shoulders are slightly above the barbell. Your hips should be lower than your shoulders but higher than your knees. Keep your back flat, your chest high, and look forward.
Form tip: Keep the bar close touching, or almost touching, your shins during the setup. This will ensure a proper bar path with less lower back strain.
Step 2 — Initiate the “First Pull”
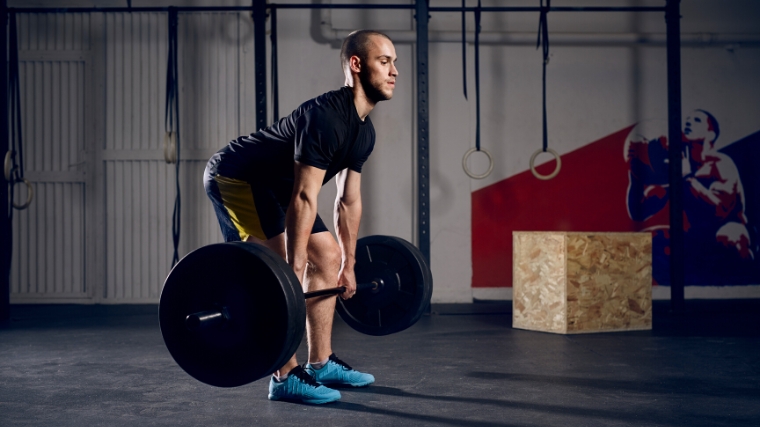
The first pull is the term for the start of the clean. It’s the moment you break the barbell from the ground and bring it to your knees. Brace your core, flex your lats, and drive with your legs by pushing your feet through the ground. Your hips and shoulders should raise at the same speed, while the barbell remains very close to your body. The first pull is not unlike the initial start of a standard deadlift.
Form tip: Because the clean & jerk is an explosive movement, you might be tempted to explode off the floor to generate force as quickly as possible. Don’t. Focus on being in control of the barbell with your whole body braced. Especially if you’re not sure about your technique, slow down your first pull.
Step 3 — Explode Into the “Second Pull”
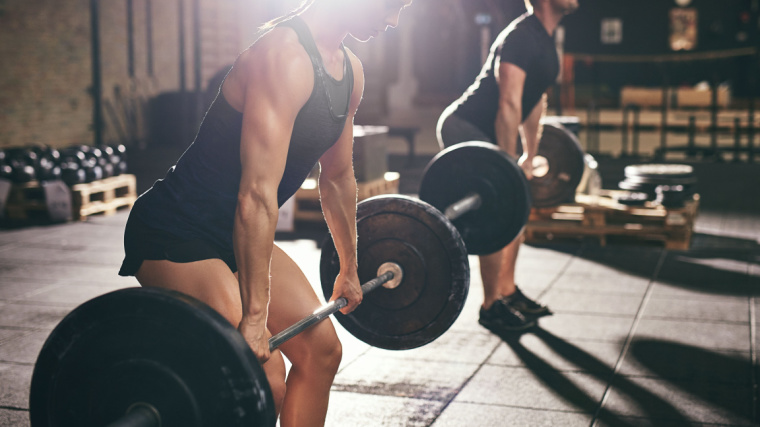
In this phase, you’ll achieve triple extension — full extension of your hips, knees, and ankles. The second pull occurs as the bar passes your knees. Now you can explode up with as much force as possible by extending your whole lower body.
While keeping your arms straight, extend your hips and knees forcefully. As you extend, push through the balls of your feet as hard as you can. Your heels should raise off the ground. If you’ve performed a complete triple extension, your body in a complete straight line, with only your toes and the balls of your feet on the floor.
Form tip: Think of jumping as high as you can to transfer maximum power into the bar, but don’t actually lose contact with the ground. Because the movement is a hip hinge, you could be tempted to explode your hips forward like a kettlebell swing to try to generate force, but it will result in an inefficient bar path. Once you pass your knees, think “up, up, up.”
Step 4 — Transition Into the “Third Pull”
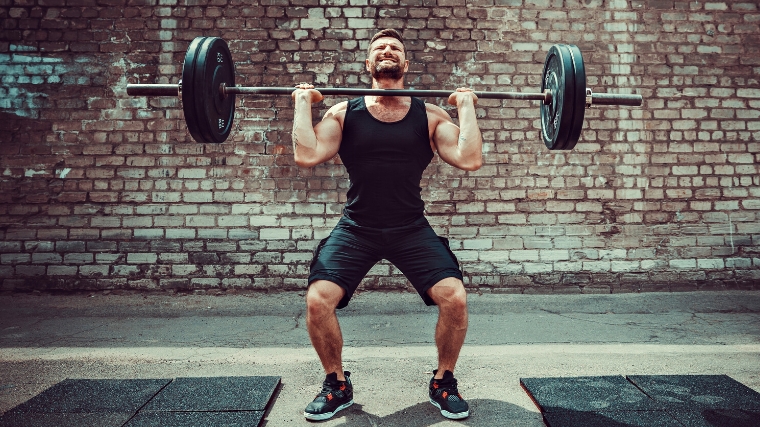
Now that you’ve transferred force from your lower body to raise the bar, the third pull is actually pulling yourself “under” the barbell to catch it. As you finish the triple extension and rise onto your toes, shrug as hard as you can to give even more energy to the bar while “pulling” yourself under it.
End up with your knees slightly bent and your chest proud, ready to receive the bar in a front rack position.
Form tip: “Attack” the ground with force. Imagine you’re trying to hit the floor as fast as you can once you stand on your toes.
Step 5 — Catch the Bar and Stand Up
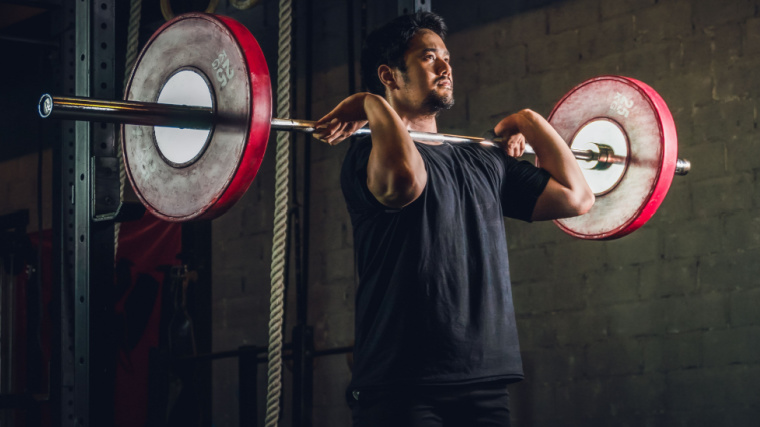
Let your arms bend and squat down to catch the bar between the front of your shoulders and your clavicles, keeping your elbows as high as you can. Perform a powerful front squat until you stand tall.
Form tip: How low you “should” squat to catch the bar depends on the weight relative to your strength, and how much force you applied to the bar. The harder and heavier it is, the deeper you’ll likely have to squat. If you have to squat to parallel or below, the movement is considered a “full clean.” If you receive the bar in a higher squat position, it’s called a “power clean.”
Step 6 — Dip Down
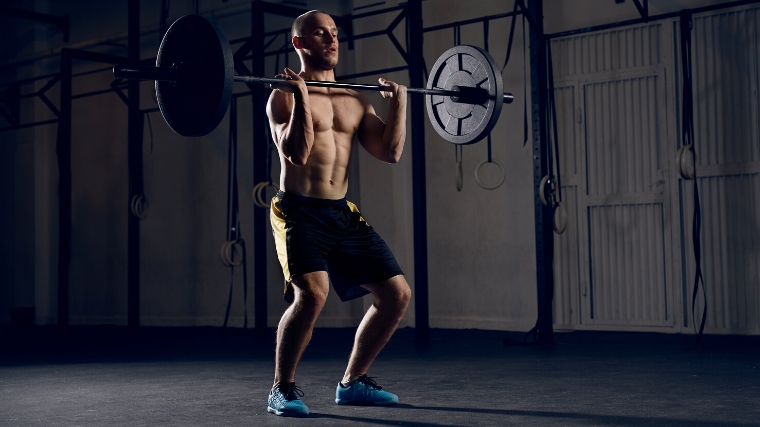
The clean phase of the lift is now complete. It’s time to tackle the jerk. From the front rack position, bend your knees and dip down a few inches to accumulate energy in your lower body. Only bend at your knees, not your hips, to ensure a vertical bar path and whole-body stability.
Form tip: Before initiating the dip, you can slightly lower your elbows, so that they are between a front squat (facing forward) and a push press (facing the ground) position. This will allow you to use a bit more shoulder power to lift the weight. Depending on your upper body mobility, you may also feel comfortable adjusting to a slightly wider hand position.
Step 7 — Jerk the Weight Up

Push as hard as you can through your legs to drive the bar up. Use the same triple extension as during the clean to generate as much force as you can — completely extend your hips, knees, and ankles — and then push the weight with your arms.
Form tip: Do not bend forward. That will sacrifice power, increase strain on your lower back, and shift the bar into a less efficient path that’s more likely to fail the lift. Keep a completely vertical bar path.
Step 8 — Split and Catch the Barbell
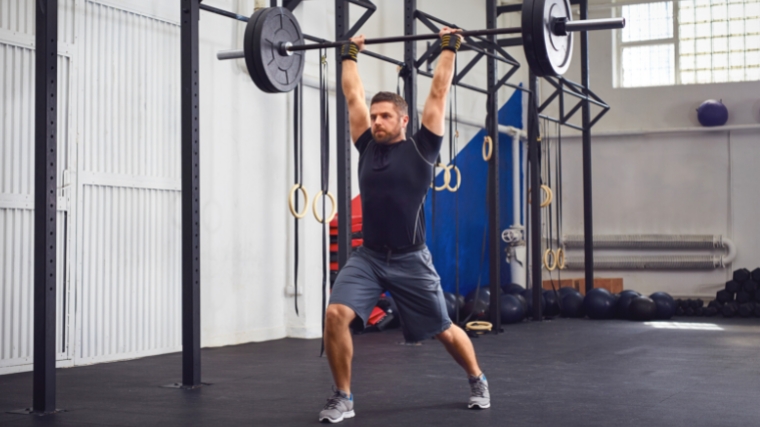
From this position, transition as fast as possible into your catch position by splitting into a half-lunge. Quickly position one leg in front of you, with your foot flat and your knee vertical, and one behind you, slightly bent and with your weight on your toes. Assume a shoulder-wide stance. Straighten your arms forcefully and keep them straight the rest of the exercise.
Form tip: The bar should end up directly over your upper back, not directly above your head. At lockout, your arms should be vertical and not angled to the front or back.
Step 9 — Recover and Finish the Lift
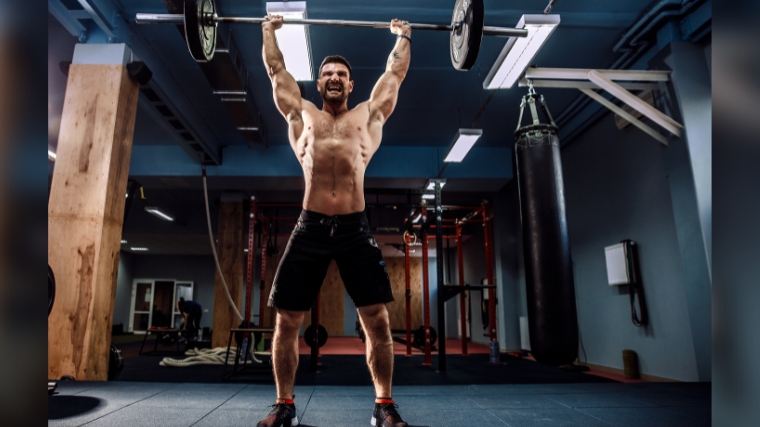
Bring your front foot back in half of the way, and then bring it directly under you. Now, bring your rear leg forward and hold the position with the bar overhead briefly. That’s it, you’ve completed a clean & jerk.
From there, if you’re on a weightlifting platform and using bumper plates, gently guide the bar back to the ground with control — don’t let it free fall wildly. If you’re lifting with metal plates, lower the bar to the front rack position across the front of your shoulders, and then lower it to your hip crease before “deadlifting” it down to the ground.
Form tip: That entire sequence was one single repetition. When the bar is returned to the ground, take a breath and refocus before performing additional reps.
Clean & Jerk Mistakes to Avoid
This exercise is very technical, so minor mistakes are bound to happen until you really nail it. Try to avoid these blunders though, as they will hinder your progress and could potentially lead to injury.
Using Too Much Weight
Technique should always come before weight with any exercise, but it rings even more true with the Olympic lifts. Using too much weight will force your body to use the path of least resistance, instead of proper technique and efficient bar path.
This results in “muscling” the weight up and grinding a lift that should be performed smoothly. You’ll never learn the proper technique that way and you’ll only risk injury, especially at the shoulder complex.
Avoid it: Make sure you use appropriate weight and feel confident in your technique before increasing the load. If you change the weight and your movement is different, you have to spend more time at a lower weight. It’s not uncommon for beginning lifters to learn the clean & jerk with a broomstick before even using a 45-pound barbell.
Not Staying Over The Bar
During the clean & jerk, your shoulders have to stay slightly in front of the bar until you finish the second pull and completely extend your body. This will help you maximize bar height and path. If your body doesn’t stay in good alignment, you can’t effectively transfer force into the bar and the bar path is less likely to be vertical.
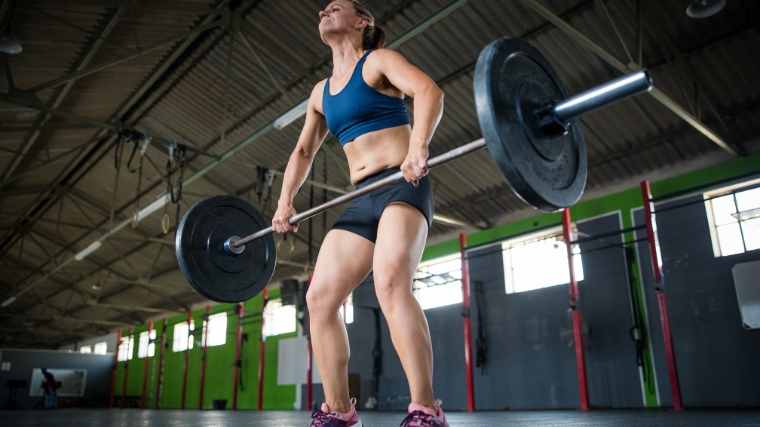
Avoid it: Keep your weight balanced over the middle of your feet. Do not put too much weight on your toes (unless you’re supposed to be in full extension) or on your heels. Do not rush the first pull. Control the bar until the moment you explode up.
Not Keeping the Bar Close to You
Keeping the bar close to you is paramount for optimal bar path, to optimize bar height and power, as well as minimizing low back strain and upper-body involvement.
If the bar drifts away from you, you’ll most likely end up performing a “muscle clean,” a technically easier variation involving much more shoulders and upper back muscle than lower body. While it can be a good exercise, it’s not a clean. You’ll never be able to use as much weight or develop total-body power.
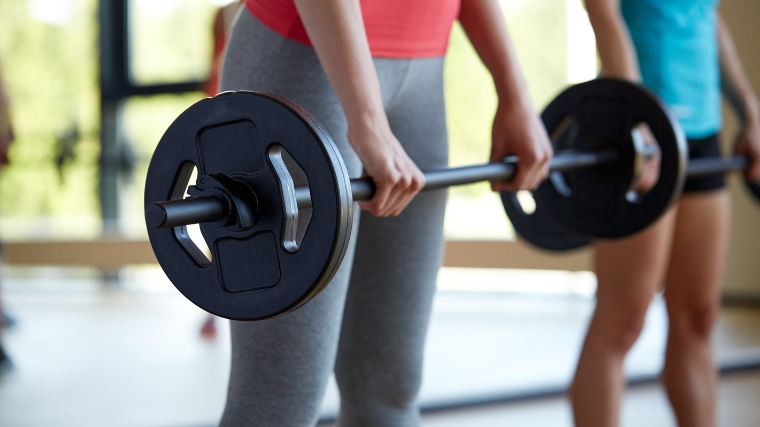
Avoid it: Keep the bar close to you at absolutely all times. Slow down the start of the lift so that the bar is grazing you until you completely extend your hips. With some people, there’s even contact at the hips.
Squatting the Dip
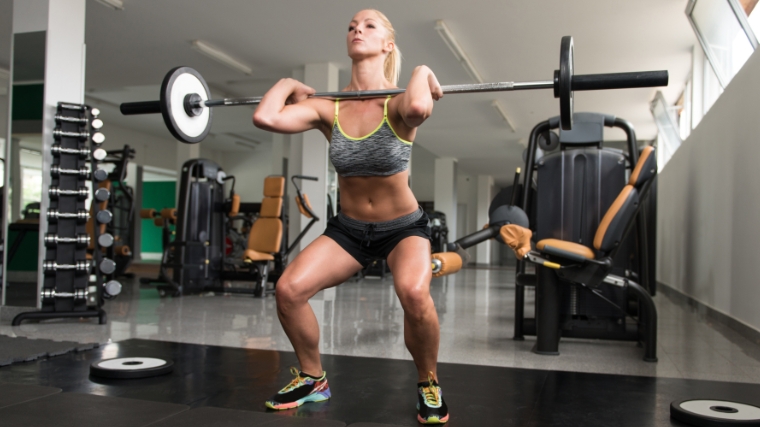
When you dip and create the leg drive, you might be tempted to squat deep. But the dip is not meant to be a squat. If you bend at your hips, you risk losing your upright position and send the bar forward instead of in a straight line in the air.
The dip should be short and fast. You shouldn’t go too low or actually squat the weight down. You’ll simply lose strength and the catch will become that much harder.
Avoid it: Only dip down a few inches while staying as upright as possible. Remind yourself, “quick dip, not a deep squat.”
How to Progress the Clean & Jerk
This lift being very technical, it might be useful to incorporate several of these progressions in your training to learn and strengthen key positions of the movement. You can incorporate the technique piece by piece. You could dedicate full workouts to the lift or you can add clean progressions to your lower body days, and jerk progressions to an upper body workout.
Clean Pull
Weightlifting is all about generating power, and the clean pull is amazing at that. This progression only consists of the first and second pull of the clean, followed by a powerful shrug and upright row.
Get into your clean position, raise the barbell to your knee with control, then violently explode up by extending your hips, knees, and ankles. Then shrug and let your elbows bend to raise the barbell to at least chest level, up until your chin. Keep the barbell close to your body at all times. This progression is great to learn how to generate power and the first part of the clean.
Hang Clean
Where most of the mistakes happen during the clean is actually at the start: during the set-up and the first pull. If you fail to execute this portion perfectly, the rest of the lift is bound to be subpar.
The hang clean avoids this by having you start the lift “from the hang”, with the barbell at around knee level — you only have to do the second and third pull and the catch. You can practice the end of the movement more easily this way.
Power Clean
The power clean is the opposite, you perform a clean with a lighter weight and you catch it only with your knees slightly bent over parallel. Not having to squat all the way down makes the movement easier especially if you’re not the most mobile lifter.
You can make the exercise even simpler and perform it from “the hang”, combining both of the best worlds for developing raw power and simplicity.
Muscle Clean and Press
Here we bypass the most technical aspects of the lifts to rely more on our muscles to perform it. You won’t be able to use as much weight, but this is a great exercise to add size to your frame.
To perform the muscle clean, get into your clean position, pull the bar up and explode like a regular clean. But, instead of positioning yourself into a squat after the full-body extension, keep your legs and torso straight and pull the weight up with your elbows as high as you can. Once they are at maximal height, quickly bring them around the bar into the front rack position to catch the bar while standing tall. From there, press the weight up by extending the arms until the bar is locked out overhead, then lower it with control to your collarbone.
Push Press
This hybrid between a press and a jerk teaches you to dip and use your legs to assist your upper body in lifting more weight. Grab a barbell with a full grip and assume a front rack position, with the barbell sitting between your anterior deltoids (front of your shoulder) and your clavicles.
Shrug your shoulders up and forward to create a kind of “muscle nest” for the bar. Lower your elbows a bit so that you’ll be able to use more arms. Dip down by bending at the knees for a few inches, then explode up as hard as you can. When your legs are completely extended, press the bar up as much as you can by trying to punch the ceiling. Then, lower it with control to the initial position.
Power Jerk
This variation is equivalent to the power clean, but with the jerk. Begin with the barbell in a front racked position, either from a rack or after having cleaned it. Dip down, then explode up and forcefully extend your arms, like a traditional jerk.
But instead of splitting your feet and catching the bar in a deep squat, you attack the ground with both feet in a traditional squat stance and receive it with your knees slightly bent. This way, you bypass the technical split catch position and focus on the first part of the jerk.
Benefits of the Clean & Jerk
If this exercise is so complicated, why do so many athletes want to learn it? It’s simple: it offers benefits no other can reciprocate (apart, perhaps, from the snatch, which is even harder). Here is what this exercise has to offer.
Increases Explosive Power
Power is the capacity to move weights as fast as possible. It’s a mixture of speed and strength, and increasing your power means you’ll most likely improve your strength and speed as well! Indeed, this exercise will teach your brain to better recruit your muscles so that they reach a higher peak force and to reach it faster.
It is also very relevant for athletes who have to move their own bodies or implements fast: they aren’t weightless. It means that this exercise will help them run faster, jump higher, throw farther, and tackle harder. If you’re an athlete, this is one of the most efficient and effective exercises to make you better at your sport. (1)
Total-Body Strength
To grab a weighted barbell and balance it over your head requires tremendous strength from head to toe (or, more accurately, from traps to calves). With the clean & jerk, you can load relatively more weight than with the snatch, so it’s an explosive movement that tends toward building pure strength and power. This exercise recruits pretty much all of the muscles in your body and puts them to the test. Indeed, it alternates between pulling and pushing phases for the whole-body.
Improves Balance, Posture, and Coordination
Holding weight in the front rack position, then throwing it in the air and balancing it overheard requires a core and a back of steel and will build strong and stable shoulders. This will result in a better posture and a more resilient back.
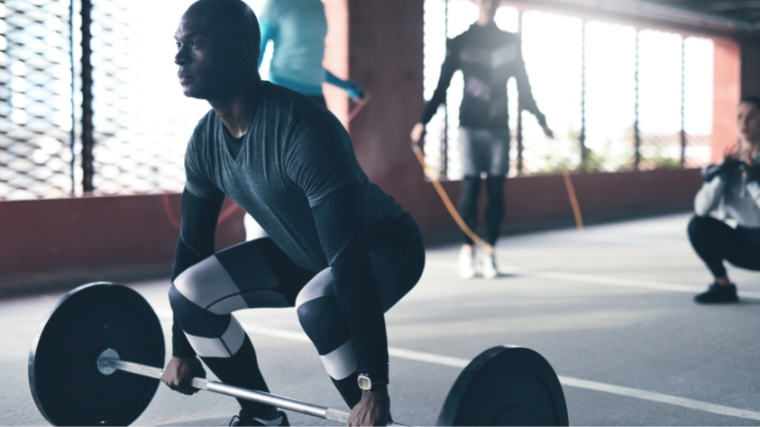
Then, you need a great deal of coordination to move with precision, speed, and strength both upper-body and lower-body limbs at the same time. Finally, it takes a whole lot of balance to maintain the split position and catch a heavy weight that way. This exercise builds strength and speed, but for that you also have to build better body mechanics and athletic qualities. (2)
Better Cardiovascular Health
As this exercise recruits pretty much all of the muscles in the body, the demand placed on the cardiovascular system is tremendous because your heart has to pump blood everywhere. Studies have found that weightlifting improves resting heart rate, VO2 max, and blood pressure. (3)
Even with an empty barbell, properly done clean & jerks can leave you breathless. No wonder relatively high reps of these are frequently used in CrossFit to gauge the endurance capacities of athletes.
Muscles Worked by the Clean & Jerk
There’s no muscles spared by the clean & jerk. From your forearms to grip the barbell all the way down to the calves to project it in the air. Let’s cover the main movers of this exercise.
Quadriceps
The quadriceps are the biggest leg muscles, and are among the body’s strongest. They go from the femur or hip bone to the tibia in the lower leg. Their main function is to extend the knee. As such, they will be responsible for most of the power generated during the exercise.
They are extensively recruited during the triple extension to project the barbell in the air, and even more during the deep front squat that follows the catch. Then, they will also be mainly responsible for propulsing the barbell upwards during the jerk, just after the dip, and to get up from the lunge required to catch it during the split.
Pressing Muscles
During the jerk, these upper body muscles will be tremendously recruited to help pressing the bar overhead and hold it there with the arms locked out. They are your deltoids (shoulder muscles), pectoralis major (chest), and your triceps (the posterior arm muscles).
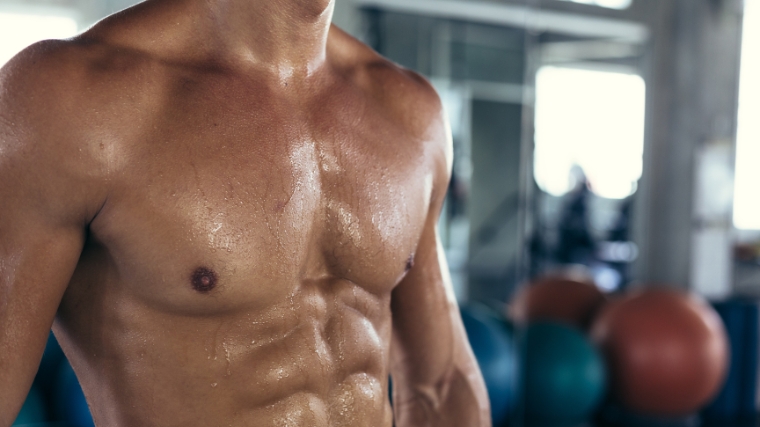
The deltoid goes from the clavicle and scapula (shoulder blade) to the humerus — the arm bone. This muscle will raise the arm upwards. The front delts will be the most recruited, but they all participate in the movement. The chest is also attached to the humerus, then to the sternum and ribs. Only its upper fibers will be recruited here, assisting the deltoids. Finally the triceps goes from the scapula and humerus to the ulna (forearm bone). Its function here is to extend the arm to press the weight up and keep the arms locked out.
Posterior Chain
The posterior chain, as a whole, will contribute to the movement. In the lower body, the hamstrings and glutes will extend the hips and be mainly responsible for the deadlift portion and cleaning the weight, while the calves will contribute to the explosive portion of both the clean and the jerk through ankle extension.
In the upper body, the erector spinae will help with hip extension as well as back extension in the clean, and the trapezius for the final pull upward. The whole of your back will be recruited to maintain posture as well as arm and scapular stability.
How to Program the Clean & Jerk
Because of its technical component, this movement has to be done in a specific way. Generally you want to avoid too much fatigue for it might result in technical breakdown that will reduce neural efficiency and increase the time to master the lift, as well as risking injury.
Medium to Heavy Weight, Low Repetitions
How heavy you can go will depend on your technical proficiency, but three to five sets of one to five reps should be the bulk of your programming. You want perfect technique on all repetitions, and this is why we avoid doing longer sets, as fatigue will generate form breakdown.
If you cannot move the bar fast, you cannot use good technique, and you’ll end up hurt. Staying in that one to five rep range ensures you’re performing mostly “neural” work, so muscular fatigue shouldn’t become an issue. Make sure to use ample rest periods of at least two minutes.
EMOM
The every minute on the minute format is an excellent way to learn the Olympic lift and practice technique, as the short breaks allow for quality work and increased density — meaning a lot of work in a short time. (4)
Set a timer that will ring every minute, or every 90 seconds if you want to go heavier. Every time the alarm rings, perform one to three repetitions and rest for the remaining time, for a total duration of ten to 20 minutes. You can get creative and use different weight and repetitions schemes during the period. You could also incorporate exercise progressions. Just be sure to always use perfect form.
For instance, you could do five minutes of three reps with the muscle clean and press, then five minutes of two reps using the power clean and push press, and finally five minutes of a one-rep clean & jerk.
Clean & Jerk Variations
If you don’t have access to a barbell, want to spice things up, or try a less challenging variation, don’t worry. There are several clean & jerk variations in stock.
Dumbbell Clean & Jerk
Changing the equipment will make the exercise technically easier while involving more muscles at the same time, especially in the shoulders and traps. Grab a pair of dumbbells and perform similar to the barbell clean & jerk.
To avoid having to go extra deep, have only one of the heads of the dumbbells touch the ground on each repetition. Because this variation is less technical and risky, you can actually use it for longer sets and enjoy muscular fatigue to build more muscle or endurance very easily. You can also do it with a pair of kettlebells.
Clean & Squat Jerk
Only the jerk portion of the lift is different with this movement. Instead of assuming a half-lunge position to catch the barbell in a split, catch it in a deep squat. After dipping down and exploding upwards, “attack” the ground forcefully with your feet in a shoulder-width stance and squat down at the required depth.
This variation requires extra mobility and balance, but has the advantage of not needing to elevate the barbell as much during the jerk in order to lift more weight because you can drop deeper in the squat position than in the lunge.
Continental Clean & Jerk
This brutal exercise typically requires an axle or fat bar. This specialized bar is used in many strongman or strongwoman contests because its two to three-inch thick grip will eventually make grip strength the limiting factor in any exercise.
To perform the continental clean, you use a mixed grip with one hand is flipped under the axle (palm up) and the other hand in a palm-down grip. Perform a traditional clean, and don’t forget to shrug hard at the top, then the bar should be guided and set at around lower sternum-level. It can help if you have a “power belly” to rest it on. Without that, a weightlifting belt can be used as a makeshift ledge.
As the bar rests, switch your underhand bar to a palm-down position, and use your hips to dip down and pop the bar up to the front rack position. From there, you can either press, push press, or jerk the weight overhead. This variation will build a bulletproof core and upper back, mainly because the continental phase is so difficult.
FAQs
This lift is best performed in a fresh start, at the beginning of the session. Indeed, you want to avoid muscular and neural fatigue in order to perform best with flawless technique. And because of its neural and power component, this exercise can also serve as activation to prime you for the subsequent exercises. For instance, doing it before heavy squats might help you lift heavier.
If you’re an experienced lifter and you’ve mastered the technique, you could also try the opposite though, and save it for last. Because your muscles are tired, your body will have no choice but to rely on technique to execute the lift.
The answer will depend upon your fitness goals and experience level, but you can certainly practice this lift somewhat often, because it’s important to avoid accumulating too much fatigue during the sessions.
Actually, doing it more often may help you progress faster. Doing it twice a week at first will yield a lot of benefits, but you could even bump it to three or four times a week. Just remember that the more you include clean & jerk sessions, the easier they should be.
A Big Lift for Big Gains
The clean & jerk is seen worldwide every four years during the Summer Olympics, but the exercise isn’t exclusive to the best weightlifters in the world. Whether you’re an athlete looking for top performance on the field or in the ring, a strength sport competitor looking to carry over strength and power, or a physique-focused lifter looking to pack on full-body muscle, adding the clean & jerk to your training menu will deliver world-class results.
References
- Huyghe, T., Goriss, B., DeLosAngeles, E., & Bird, S. P. (2021). Exploring The Power Clean. International Journal of Strength and Conditioning, 1(1). https://doi.org/10.47206/ijsc.v1i1.95
- Santos PDG, Vaz JR, Correia PF, Valamatos MJ, Veloso AP, Pezarat-Correia P. Intermuscular Coordination in the Power Clean Exercise: Comparison between Olympic Weightlifters and Untrained Individuals-A Preliminary Study. Sensors (Basel). 2021 Mar 9;21(5):1904. doi: 10.3390/s21051904. PMID: 33803182; PMCID: PMC7963197.
- Stone MH, Wilson GD, Blessing D, Rozenek R. Cardiovascular responses to short-term olympic style weight-training in young men. Can J Appl Sport Sci. 1983 Sep;8(3):134-9. PMID: 6640815.
- de-Oliveira LA, Heredia-Elvar JR, Maté-Muñoz JL, García-Manso JM, Aragão-Santos JC, Da Silva-Grigoletto ME. Analysis of Pacing Strategies in AMRAP, EMOM, and FOR TIME Training Models during “Cross” Modalities. Sports (Basel). 2021 Oct 20;9(11):144. doi: 10.3390/sports9110144. PMID: 34822344; PMCID: PMC8624389.
Featured Image: Photology1971 / Shutterstock
