“], “filter”: { “nextExceptions”: “img, blockquote, div”, “nextContainsExceptions”: “img, blockquote, a.btn, a.o-button”} }”>
Heading out the door? Read this article on the new Outside+ app available now on iOS devices for members!
>”,”name”:”in-content-cta”,”type”:”link”}}”>Download the app.
It’s not an overstatement to say that many of us feel out of control at this moment in time. Amid wars, systemic racism, social inequality, gender injustice, gun violence, and the lasting effects of the pandemic, it’s understandable that we either want to throw our hands up in surrender or start meddling in an attempt to wrestle control wherever we can.
But despite marginal and occasional headway from our actions, most of our attempts to control something or someone are ineffectual. We are left doubly burned out—exhausted both by our initial anguish and the fatigue of fighting against it. This, at least, has been my experience.
The Illusion of Control
I grew up in an alcoholic home in which many of my immediate family members were dealing with addiction. Even happy days were tinged with fear as anyone’s mood could turn on a dime. As a child, I felt very out of control in a tumultuous environment where each moment was shaped by so much uncertainty.
As an adult, I’ve felt compelled to control everything I could. I controlled my body through exercise. I controlled my life through rigid boundaries and overscheduling. And I obsessed about and tried to manage the lives of my family, friends, which proved to be far more challenging. After decades of futile attempts, I exhausted myself trying. What I didn’t realize was that I was struggling with an addiction to control.
Two and a half years ago, desperate for peace, I stumbled into Al-Anon, a program for family and friends of those with substance abuse disorders. Every meeting began with members reciting the serenity prayer written by Reinhold Niebuhr.
“God, Grant me the serenity to accept the things I cannot change, the courage to change the things I can, and the wisdom to know the difference.”
The first several times I attended meetings, I parroted these words. It wasn’t until I was on my yoga mat one day that I started to understand their meaning.
“The courage to accept the things I cannot change” wasn’t telling me to be complacent and lie down helplessly. Instead, it was asking me to discern what I have influence over. I may not be able to control how someone else shows up to life or how my body will respond to a pose, but I can control how I approach the situation. That’s what the “courage to change the things I can” refers to. I can control my choices and my actions.
The serenity prayer is an instruction manual for living in an uncertain world. I would even argue that it’s the essence of many of yoga’s principles, specifically the teachings of prakriti, which is that nature is ever-changing, and, in contrast, purusha, which is our ever-present and individual self.
Keeping that in mind during our yoga practice can help us explore what we can and cannot control in our bodies. Through “truth-telling” poses, we face things we may not have much agency over (like anatomy!) so that we may find the self-kindness, self-awareness, and courage to change the things we can.
Yoga to Help “Accept the Things I Cannot Change”
1. Easy Pose (Sukhasana)
This seated pose is often classified as a hip opener. But what happens when you can’t control the range of motion in your hips, low back, and gluteus maximus muscles? Slouching. Focus instead on helping yourself to sit as tall and comfortably as possible with as little discomfort as possible so you can actually experience what is intended in the pose, which is becoming present with yourself. Simply come to sit on a folded blanket or other props to help create more space—and, hence, comfort—in your hips.
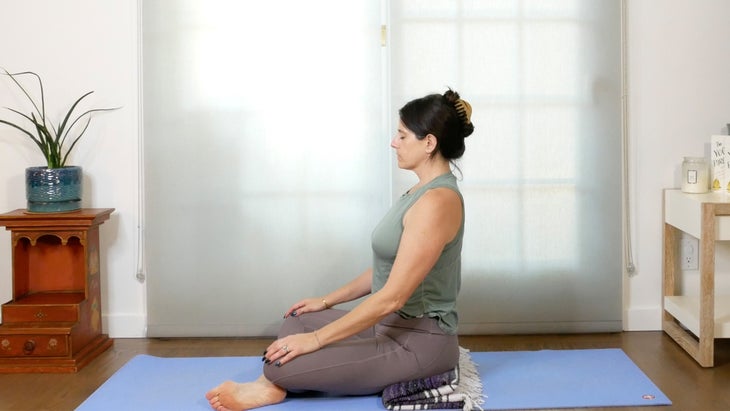
How to: Come to sit on your mat. Cross your right shin in front of your left shin. Try to align your knees over your ankles. Press into your sit bones and sit tall while keeping your head over your pelvis and your chin level with the floor. Rest your hands, palms down, on your thighs. If your knees are higher than your hips, sit on a folded blanket. Once comfortable, close your eyes, and remain here for 25 slow breaths.
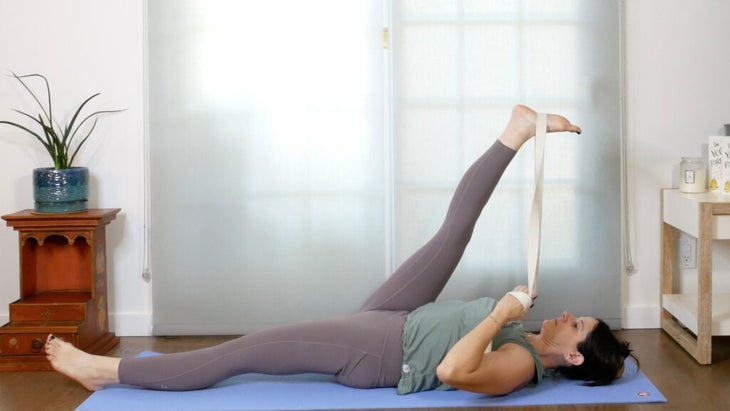
2. Reclining Hand-to-Big Toe Pose (Supta Padangusthasana)
In this shape, we often get distracted by the lifted leg and how high or straight it is. This demands considerable hamstring flexibility. When you prioritize that at any cost, it can create misalignment in our lumbar spine and sacroiliac joints (S.I. joints). Instead, focus on even lengthening along each side of your body and a level pelvis. You can’t control the length or tone of your hamstring muscles, but you can bend your lifted knee, which can help level your pelvis.

How to: Lie on your back. Draw your right knee into your chest and extend your left leg straight along the mat. Place a strap around the ball of your right foot, hold the ends in both hands, and stretch your right foot skyward. Before you grab your strap, place your hands on your hips to ensure your pelvis is level to the floor. Bend your right knee as much as you need until your torso feels evenly long on both the right and left sides.
Let your elbows rest gently by your sides. Stay here for 10 breaths. To come out, release the strap and hug both knees toward your chest before switching to your left side.
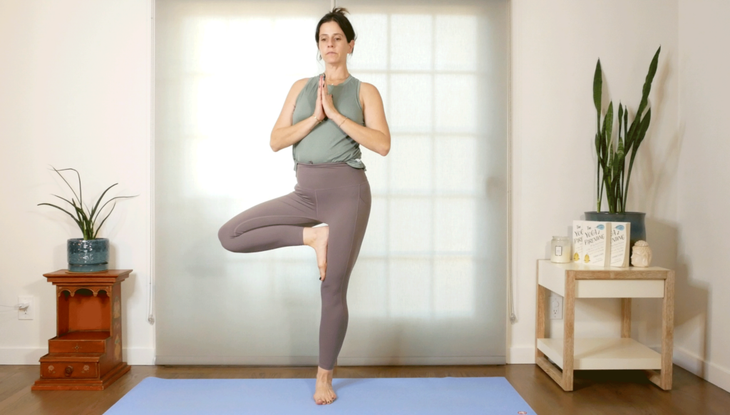
3. Tree Pose (Vrksasana)
When we emphasize the external appearance of the pose versus the internal reality of our anatomy, we encounter problems. For example, in Tree Pose, your hips can “feel” super open if you let your entire pelvis swing toward the lifted leg side, but that isn’t revealing anything about your range of motion. It’s simply swiveling your hips. Try keeping your pelvis stable and facing forward as you open your lifted leg toward the side.
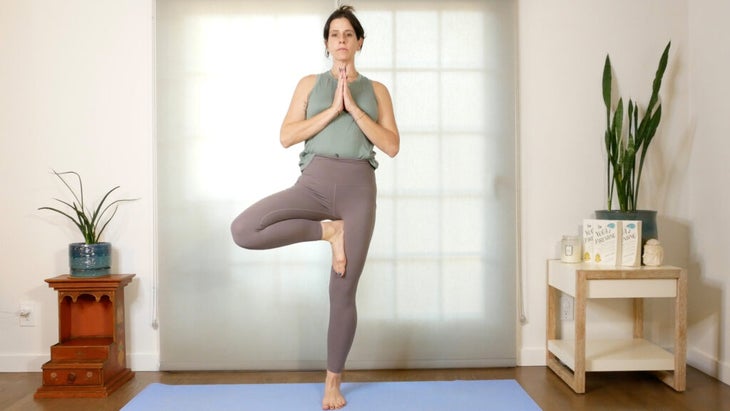
How to: Stand in Mountain Pose. Bend your right knee and open it to the side, placing your right foot on your left ankle, calf, or inner thigh. Start with both hands on your hips and steer your pelvis so your frontal hip bones point straight ahead as you open your inner right thigh. Consider reaching your arms overhead. Gaze forward or challenge your balance by looking straight up. Stay here for 8 breaths. Lower your lifted leg and pause in Mountain Pose before setting up for your second side.
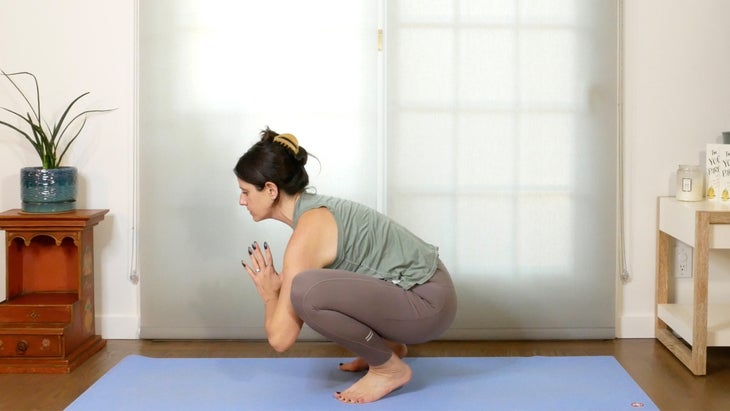
4 . Garland Pose (Malasana)
Lack of mobility or misalignment in a pose is often due to several factors rather than just one body part. Malasana is a strong example of this. Many factors affect whether you can lower your heels to the mat in a squat, including the unique anatomy of the way your hip bone fits in your hip socket and/or the tightness of your calves and achilles tendons. While you can’t control much of this, you can make accommodations so that you experience the intended feeling of the pose.
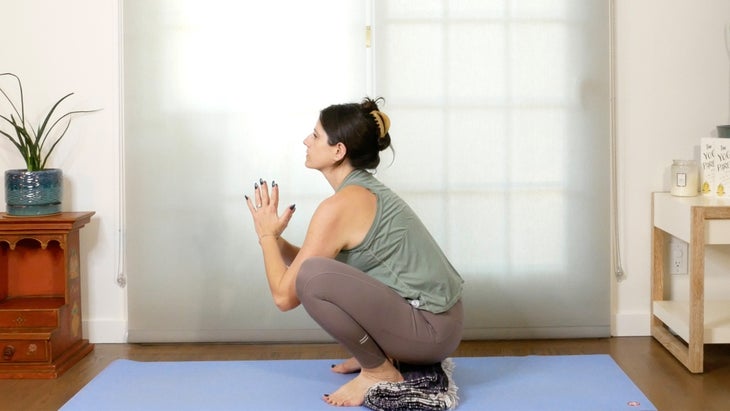
How to: Begin in Mountain Pose. Separate your feet hip-width apart and turn your feet out about 45 degrees. Bend your knees and lower your bum toward the mat into a squat position. If your heels remain lifted off the mat, place a rolled blanket underneath them. Bring your hands into prayer at your chest. Even though you are in the sitting position, imagine your pelvic floor lifting from the mat, especially on your exhales. Lengthen through your spine and keep your eyes forward or straight down. Stay here for 10 breaths. Slowly straighten your legs, turn your feet straight ahead, and bend forward in Standing Forward Bend (Uttanasana) for a few breaths.

5 . Gate Pose (Parighasana)
Side bends are great truth-tellers as we can easily become misaligned in them by overly arching our side ribs to get your bottom hand to the floor, which may seem like the goal of Gate Pose. Instead, see if you can focus on creating an even arc in your side body and spine instead. You can’t control the flexibility of your side body, but you can always change how high your bottom hand goes, which will provide more length and space for your spine to arc comfortably and prevents unnecessary strain on your back.
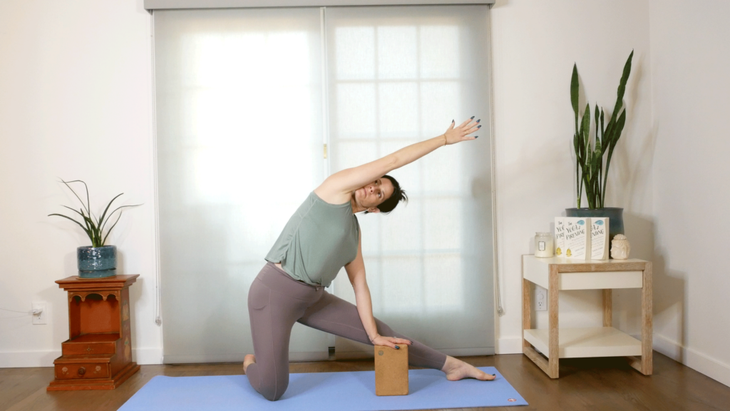
How to: Come to a kneeling position facing the long side of the mat. (You can tuck a folded blanket beneath you if that’s more comfortable.) Step your right leg straight out to the side and externally rotate your right hip so your right toes face the ceiling. Point your right foot as though you are trying to touch the floor with your toes. As you inhale, reach your left arm toward the ceiling and on an exhale side bend over your right leg and place your right hand lightly on your shin or the mat. If you notice you’re holding your breath or slouching, place your bottom hand on a block. Stay here for 10 deep breaths.
Press into your left shin and on an inhale lift your torso upright. Bring both knees together, kneeling for a pause before repeating on your left side.
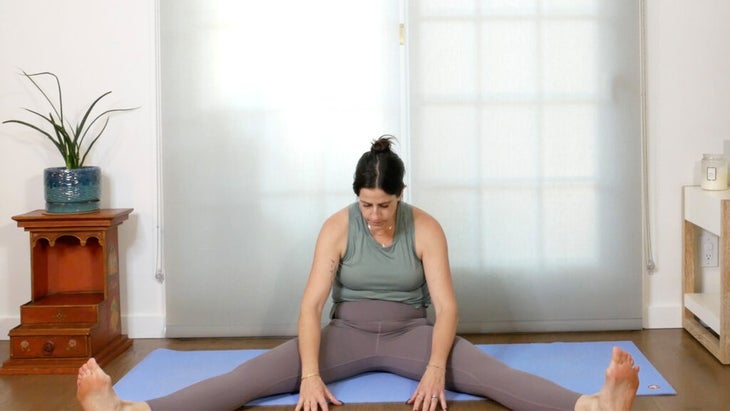
6. Wide-Angle Seated Forward Bend (Upavistha Konasana)
What is more humbling than a seated forward bend? This pose can be shockingly challenging, even for those of us who are used to bending forward from standing with ease. While you can’t control how much flexibility you have in your hips and lower back, you can always bend your knees and/or sit on a blanket to keep your torso upright, which helps you feel the stretch where it’s intended.
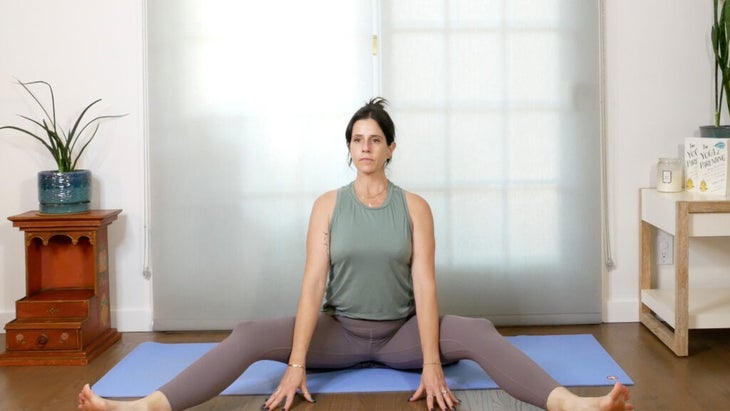
How to: Sit on the floor and take your legs apart in a V shape. Begin to hinge forward at your hips, walking your hands forward as you keep your spine straight. If your back starts to round, sit on a folded blanket. If your movement still feels restricted, try bending your knees. Keep your ears in line with your shoulders by looking down toward the floor. Stay here for 10 breaths. Slowly walk your hands back toward you to lift yourself. Use your hands to bring your legs together and pause in Staff Pose (Dandasana).
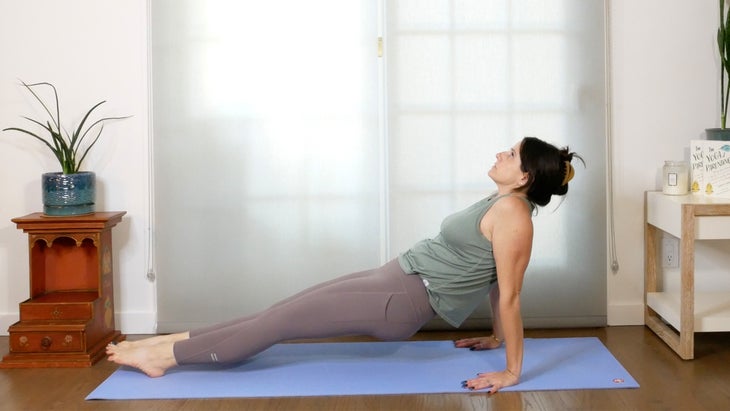
7. Purvottanasana (Upward or Reverse Plank Pose)
In this classic shape, your legs are straight and your toes touch the floor. It’s a strong quadricep and abdominal stretch that also strengthens your shoulder girdle. However, if you straighten our legs prematurely, you’ll struggle to keep your hips lifted and sacrifice the length in your lower back. You can’t always keep your hips lifted, but you can always change whether you bend your knees.
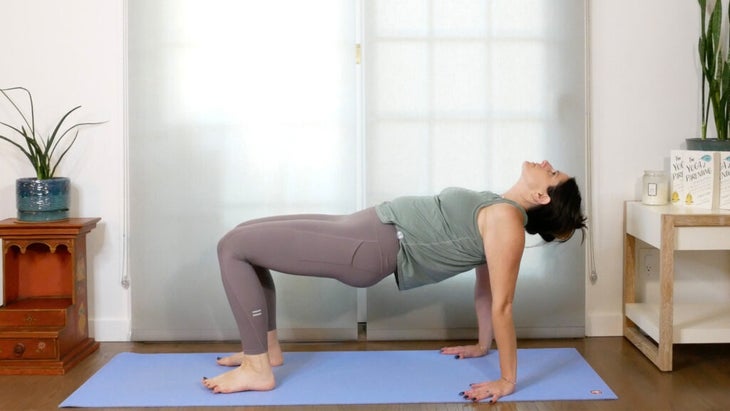
How to: From Staff Pose, place your hands a few inches back from your hips with your fingertips pointing forward. As you inhale, press your palms into the mat, lift your hips, and point your toes. Try to keep your hips lifted as much as possible. Your head can release back if your chest remains lifted; otherwise, gaze at your chest to keep the back of the neck long. If that’s challenging, lower yourself and realign by bending your knees and placing your feet on the mat before lifting your chest toward your chin in Reverse Tabletop. Stay here for 8 breaths.
Hinge at your hips and lower your bum to the floor, returning to Dandasana.
There’s absolutely nothing wrong with the traditional approach to Savasana. It’s characteristic shape can actually become a recognized ritual to body and mind, prompting us to relax on cue. (Photo: Sarah Ezrin)
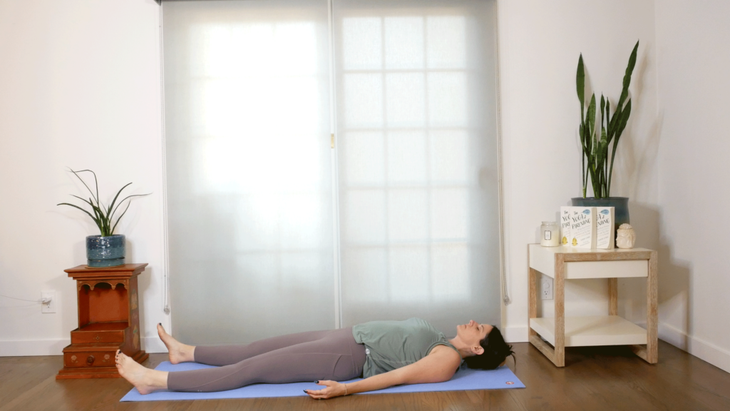
8. Prone Savasana (Corpse Pose Variation)
Doing Savasana on your tummy allows you to differentiate between surrender and simple complacency. How often do you suffer through something thinking that you have no agency? Even if a teacher cues this variation of Savasana—or any pose—you still have agency to choose a variation that is more restful for you. If this version is too stifling or uncomfortable, turn yourself over and lie on your back.
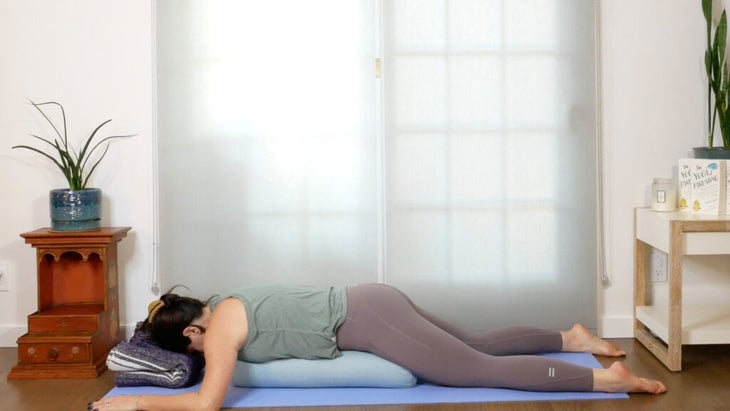 Practicing Savasana while prone can help you discern where you still feel the need to grip or hold onto control. (Photo: Sarah Ezrin)
How to: Place a bolster lengthwise along the center of your mat. Fold a blanket and place it a few inches away from the top of your mat. This will act as a face pillow like when you’re receiving a massage. Lie on the bolster so it runs the length of your chest, tummy, and pelvis. Settle your forehead onto the blanket so you can breathe comfortably. Allow your legs to fall into a restul position and bring your arms either by your sides or overhead like a goal post or cactus arms. If you need to turn your head to the side rather than being face down, remember to turn it the other way half way through. If the whole pose is a big no-no in your body, flip onto your back and take a classical supine Savasana instead so you can remain here in comfort for a good 5 to 7 minutes.
When you are ready to come out, slowly come onto hands and knees and take a few Cat and Cow poses before settling into Child’s Pose (Balasana). Remain there a few moments before coming up to a comfortable seated position. Pause and consider the effects of your practice.
Reflection
It’s actually incredibly empowering to take ownership of the things we can. We’re often so afraid of giving up control because we fear we will be weakened or vulnerable, but it is through accessing the courage to change the things we can where we find our strength.
About Our Contributor
Sarah Ezrin is a mama, a world-renowned yoga educator, a popular Instagram influencer, and the author of The Yoga of Parenting. Her willingness to be unabashedly honest and vulnerable along with her innate wisdom make her writing, yoga classes, and social media great sources of healing and inner peace for many people. Based in the San Francisco Bay Area, Sarah is changing the world, teaching self-love one person at a time. You can follow her on Instagram at @sarahezrinyoga and TikTok at @sarahezrin.